List View of Appointments
About the Feature
The List View in the appointment scheduling Module is the view that lists all the appointments for a particular day. Its a tabular view of the appointments with details of Time, Service/Service appointment Type, Provider, Notes etc. This view can also be printed.
How is it used
List View
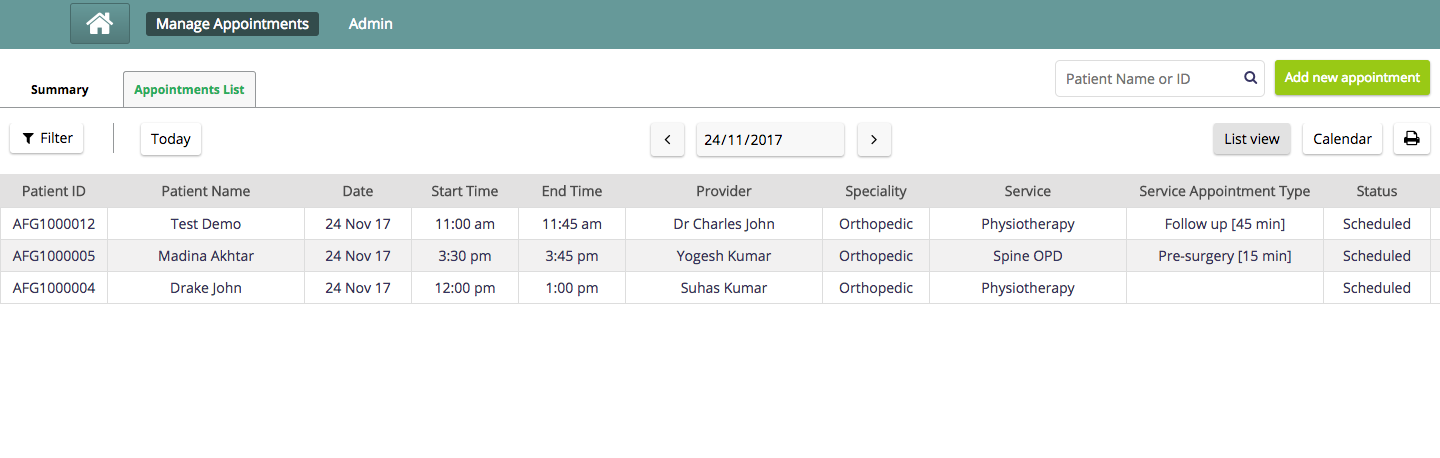
- This view can either be accessed form the 'Appointments List' Tab or by clicking on the numbers (load) on the . It lists all the appointments for the current day by default. For each appointment one can see the following details:Patient - Name and ID
- Appointment slot (Date and time)
- Service, Service Appointment Type
- Provider, Location - Tagged to the appointment
- Notes entered during creating appointment
- Status - Scheduled, Checked in, Completed, Missed or Cancelled.
- Appointment Type: Walk in, Scheduled
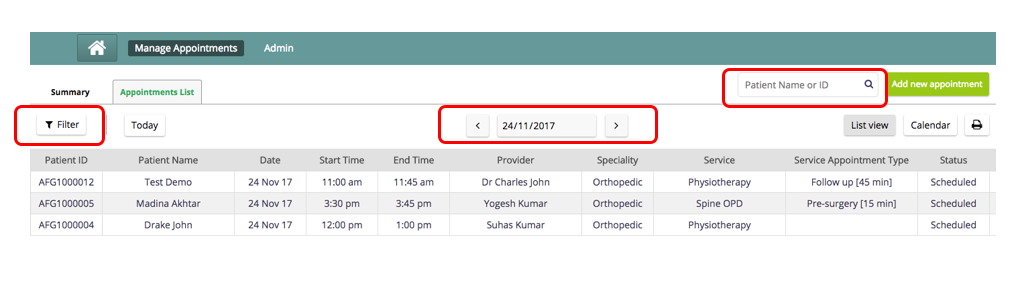
2. It is only a Daily View with a date picker on top. One can navigate across days using the data navigator. The List View also has a field.
3. Users can also filter the appointments on the list view. You can read more about filters below.
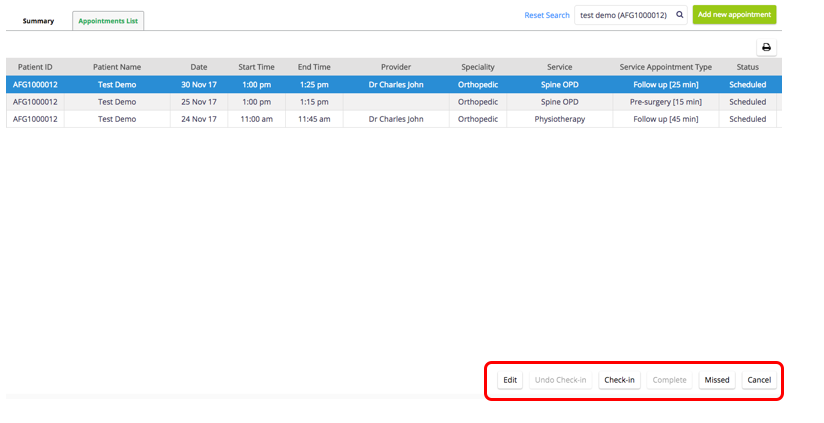
4. There are also a list of actions that present on the bottom of the list view. These are Check in/Undo Check in, Edit, Complete and Cancel. They will get enabled based on the status of the appointment selected.
Filters on the List View
User will be able to filter the appointments based on Speciality/ Service/Service appt. Type, Provider and status.
Using the Filter
- The filter parameters are available on the left hand side of the screen. The filter panel is open by default. Can be closed/hidden by clicking on the blue arrows of the filter section.
- If filters are applied then that icon will be shown in blue colour, else in black.
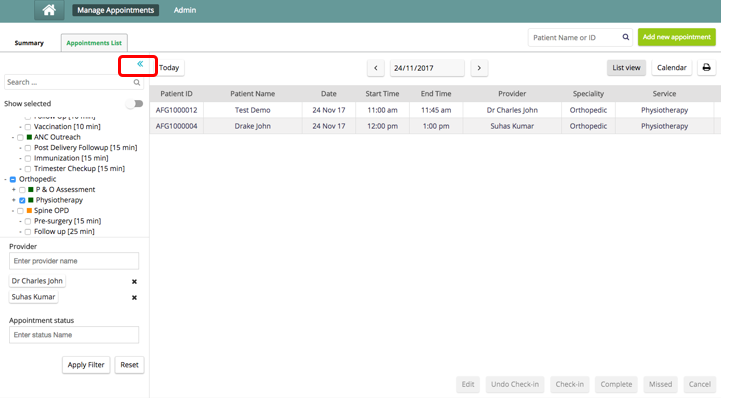

2. The following fields are available for a user to filter the list of appointments:
- Specialty/ Service/ Service Appointment Type
- Provider
- Status of the appointment
3. The Speciality, Services and Service appointment types are shown in a hierarchical fashion in the filter. The Speciality will show services and the services will show the sub types below them. Services with no speciality will all be grouped under “No speciality”. If the implementation does not have Speciality or Sub types then that particular level in hierarchy will not be visible.
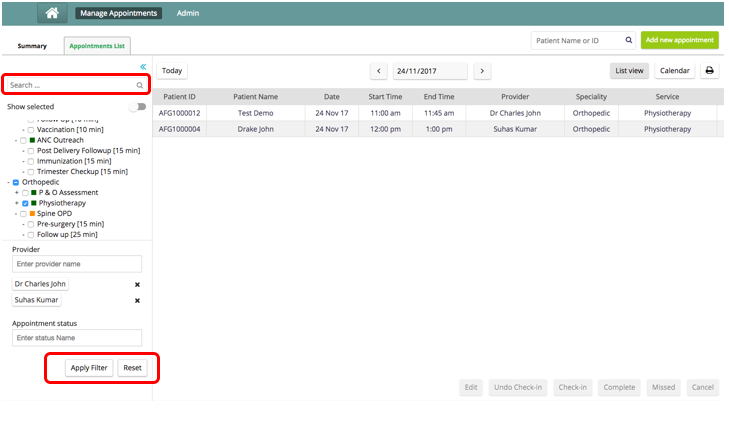
4. There is a Search field common for all the three ( Speciality, Service, Service Appt. Type) : User can search for any of them in this field
5. There is a Toggle called "Show Selected”. Turning it on will display all the selected filter criteria
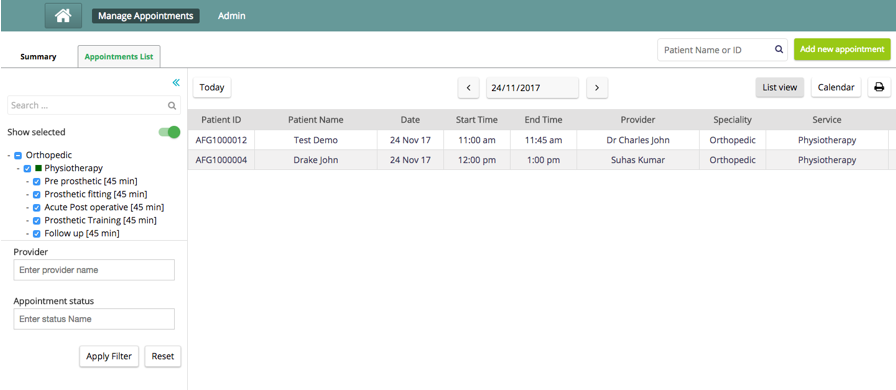
6. Provider and Appointment status are multi-select dropdown fields. Users can select multiple status and Providers
7. Click on "Apply Filter" button to filter the appointments as per the parameters selected and "Reset" to clear the applied filters.
Show Language of the patient in ListView, Appointments module
we would like to see the Language of the patient that we capture as a patient attribute, in the list view page. This information is important in the context of appointments because the Interpreters in the hospital plan their schedule based on the appointments & the patient’s language.
The following approach has been decided for the above mentioned problem.The gist of the discussion and the use cases implemented are given below - The same has been updated in the talk thread too.
1. A new configuration element say “additionalInfoColumns” will be introduced which contains the names of the columns to be displayed. example “additionalColumns” : [“language”, “spouse_number”]
2. Assuming the following details comes as the additional information from the custom_module,
_{ “language” : “English”, “otherLanguage” : “Hindi”, “spouse_name”: “Name1”, “spouse_number”: “12345678” } _
Based on additionalInfoColumns list [Refer step 1], new columns with names “language” and “spouse_number” will be added to the appointment list view and the respective values[as got in additional Information] will be shown under the respective columns. --It is to be noted that additionalInfo column will not be shown in case we are adding new columns.
3 In case there are no column names given - eg: “additionalColumns” : [ ], then no new columns will be shown and all the values coming as additional information, will be shown as comma separated values under additionalInfo column.
Bahmni Wiki · CC BY-SA 4.0