Bahmni - DHIS2 Integration
Install and configure DHIS2 integration app
Assuming you have Bahmni installer latest version installed and running successfully. (Tested with 0.89 version, should work with previous version as well)
- Download and install dhis-integration rpm from https://github.com/Possiblehealth/possible-artifacts/blob/master/90-artifacts/dhis-integration-1.0-1.noarch.rpm (or build latest yourself from here: https://github.com/Possiblehealth/dhis2-integration)bashEmacs
yum install dhis-integration-1.0-1.noarch.rpm - Update the properties file for DHIS2 integration app, located at '/etc/dhis-integration/dhis-integration.yml', with right configuration.KeyDescriptionExampleopenmrs.root.urlUrl to access Openmrs servicehttp://localhost:8050/openmrs/ws/rest/v1bahmni.login.urlWhen user isn't logged in, then user is redirected to this url.https://ehr.possible.org/bahmni/home/#/login?showLoginMessage reports.urlBahmni reports url. Used for downloading reports.https://ehr.possible.org/bahmnireports/reportreports.jsonThis file contains configurations of DHIS2 reports./var/www/bahmni_config/openmrs/apps/reports/reports.jsondhis.config.directoryThis folder contains DHIS2 integration configurations program wise./var/www/bahmni_config/dhis2/dhis.urlThe DHIS2 government server instance url.Ex. 1: http://100.100.100.100:8080/Ex. 2: http://200.100.20.30:8888/hmistest/Note that the url could be at domain or ip address level (ex1) or could be at a specific path(ex2)dhis.userThe username to access DHIS2 instance.usernamedhis.passwordThe password for the DHIS2 user.passwordopenmrs.db.urlMysql connection url to access "openmrs" database. Set valid user and password in the url.jdbc:mysql://localhost/openmrs?user=openmrs-user&password=passwordsubmission.audit.folderAll DHIS2 submissions are stored in this directory. Ensure the directory exists and "bahmni" user has access to it, or configure a different directory./dhis-integration-dataserver.portServer config. Port for server to listen to.8040server.context-pathServer config. Mapping incoming requests./dhis-integration/log4j.config.fileServer config. Properties file for logger of dhis-integration server.log4j.properties
- Download and place the ssl.conf file.bashEmacs
cd /etc/httpd/conf.d/ wget https://raw.githubusercontent.com/Possiblehealth/possible-config/89662e8e823fac3dbcaf111aa72713a63139bb03/playbooks/roles/possible-dhis-integration/templates/dhis_integration_ssl.conf - Configure Bahmni landing page to show DHIS2 integration app.
Insert the following in "/var/www/bahmni_config/openmrs/apps/home/extension.json" filetextEmacs
"possible_dhis_2_integration": { "id": "possible.dhis2Integration", "extensionPointId": "org.bahmni.home.dashboard", "type": "link", "label": "DHIS2 integration", "url": "/dhis-integration/index.html", "icon": "fa-book", "order": 11, "requiredPrivilege": "app:reports" } - Ensure Bahmni reports service is installed and running successfully.bashEmacs
service bahmni-reports status ##should be running - Restart ssl and dhis-integration services.bashEmacs
Now the DHIS2 integration app is available on landing screen, given that the user has reporting privileges.
service httpd restart
service dhis-integration restart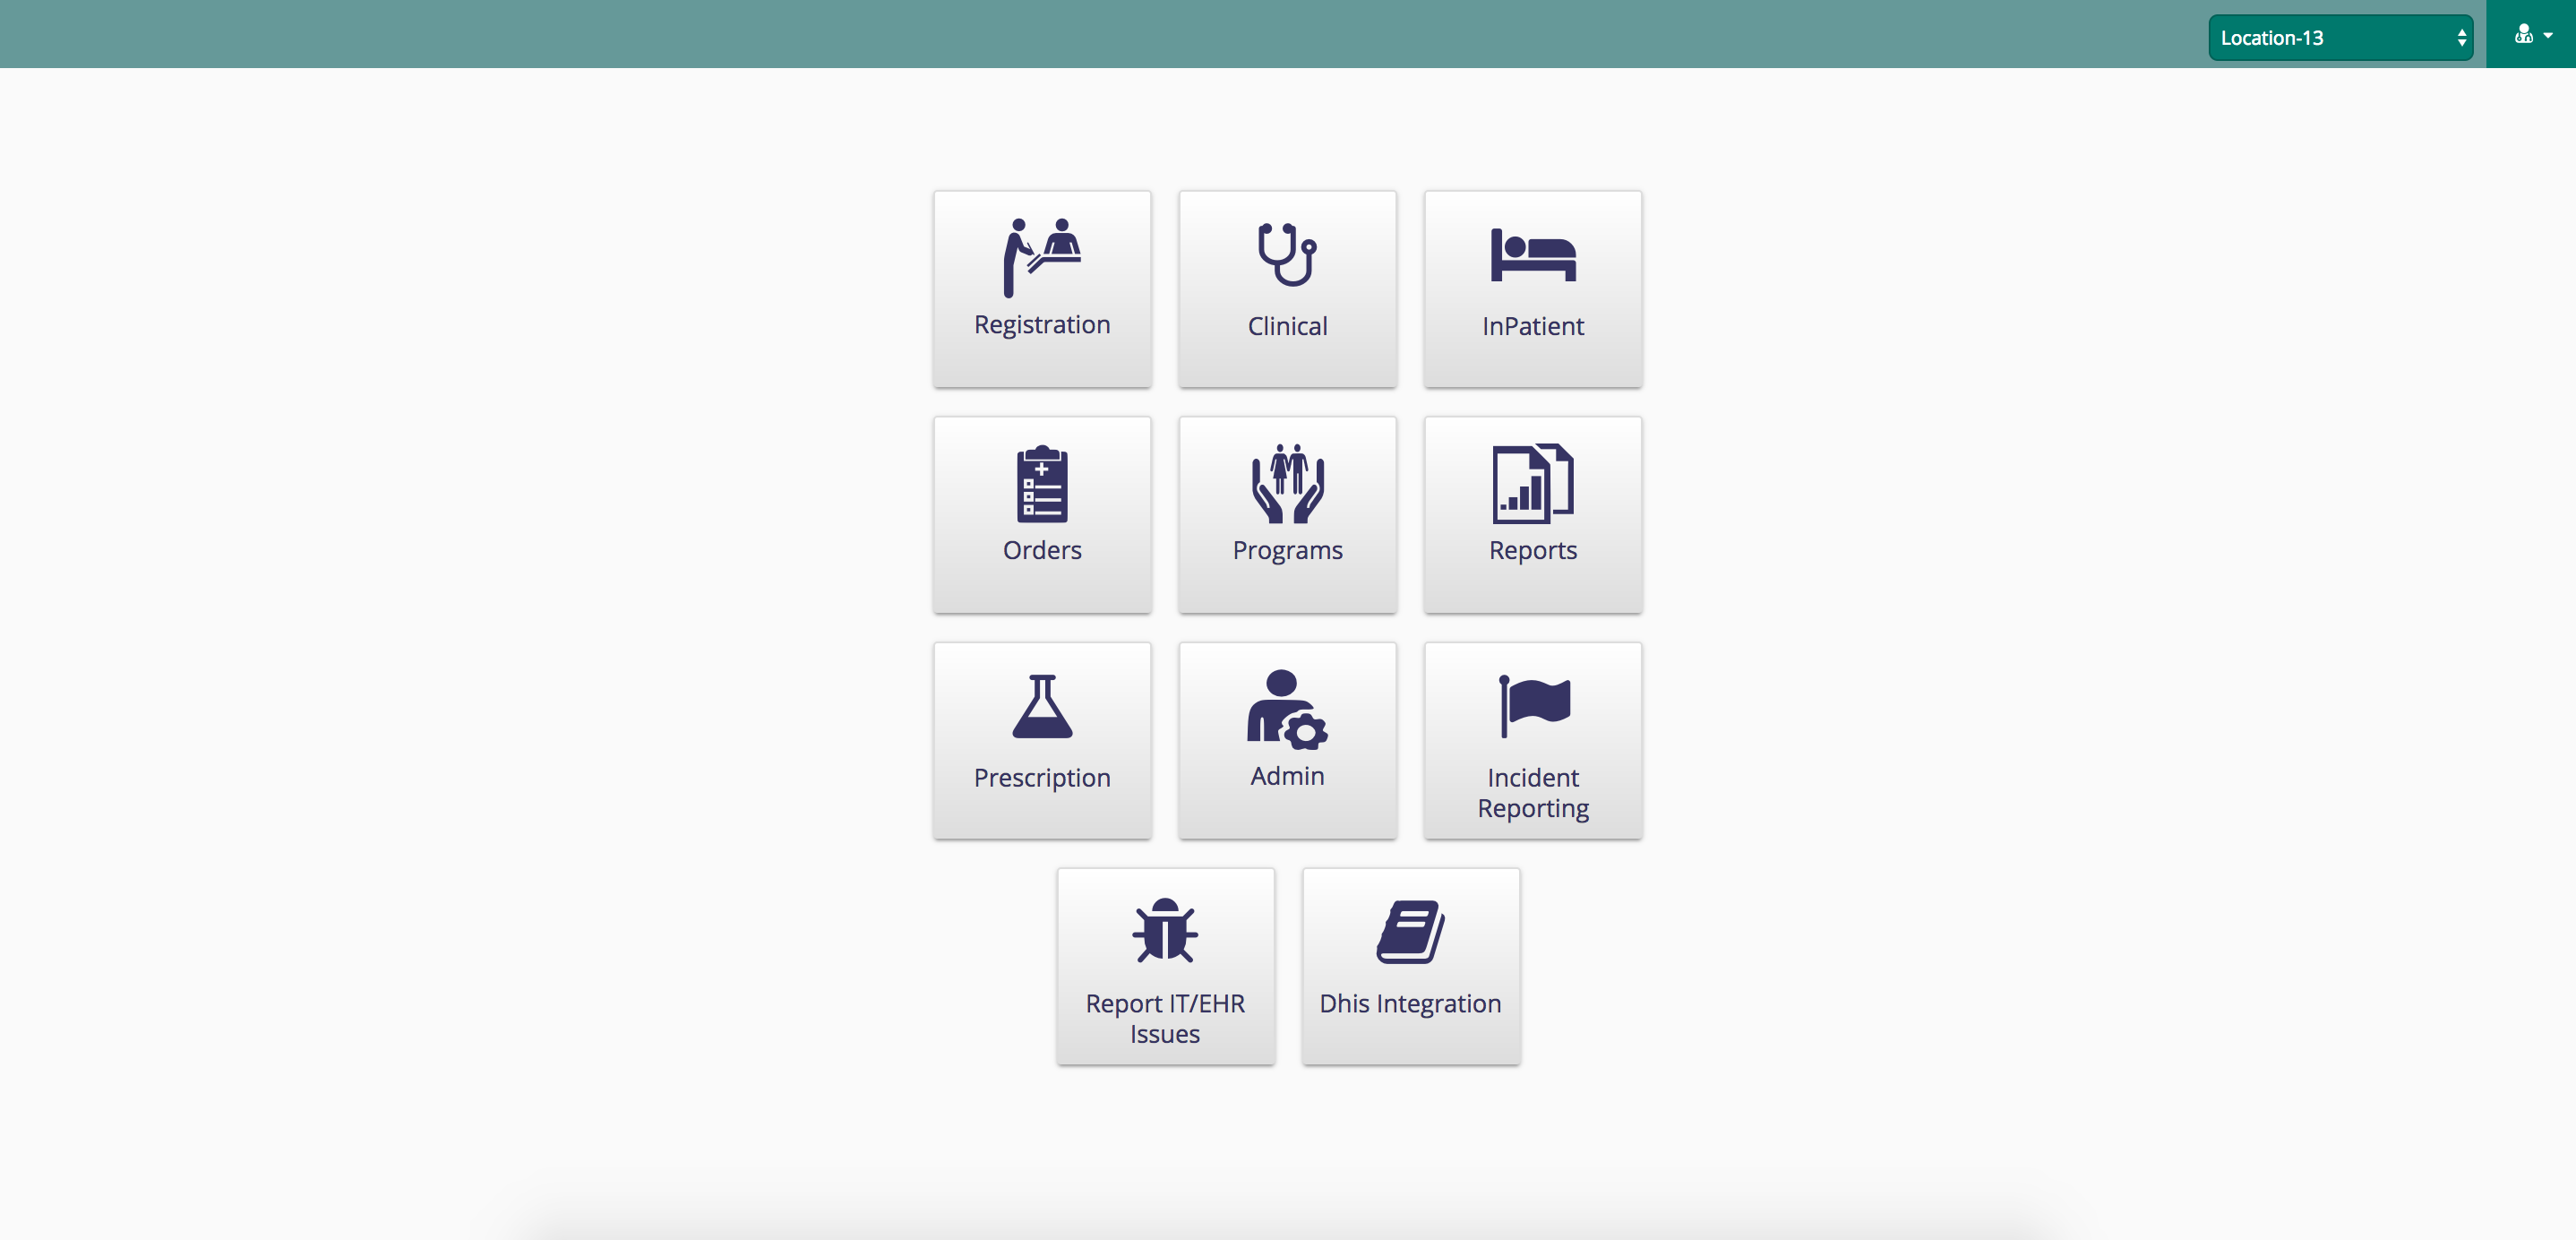
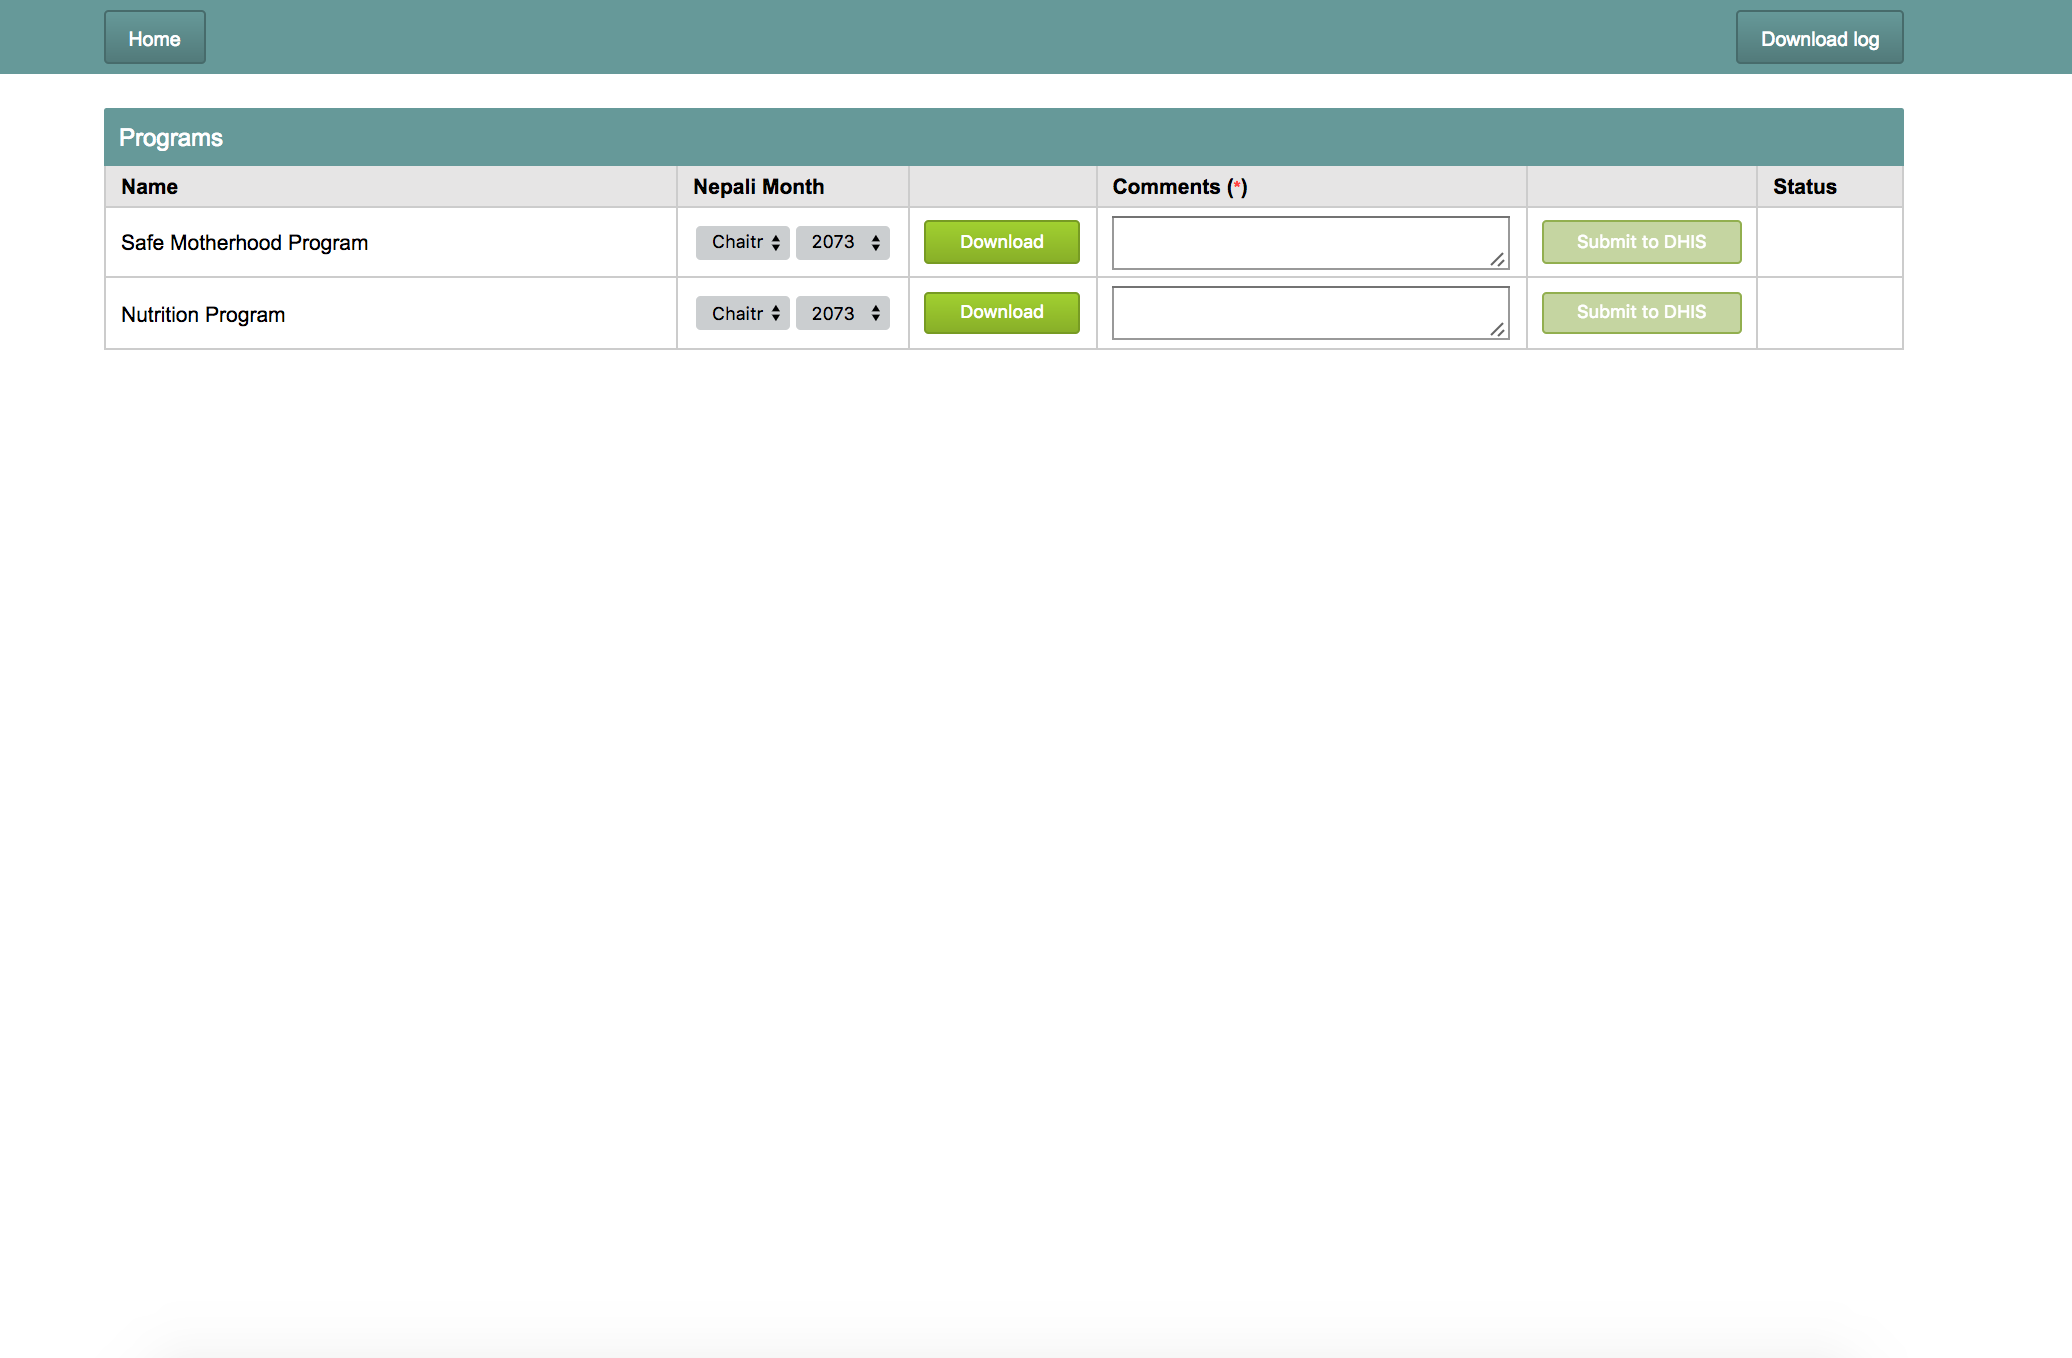
Once you open the app you land on DHIS integration app page, where you select the month and year for given program, type a comment and submit report.
Configure New Program
- Configure the concatenated reports for the program
- Put the following configuration in the concatenated report to make it DHIS2 program.textEmacsExample: Safe motherhood program
"DHISProgram": true, - Create a DHIS configuration file for the program with the name of program under '/var/www/bahmni_config/dhis2/' folder.To use different folder change 'dhis.config.directory' configuration at '/etc/dhis-integration/dhis-integration.yml'.
DHIS configuration file should have the following structure.
DHIS Config
{
  "orgUnit": "<orgUnitId | find it from DHIS instance>",
  "reports": {
    "<name of 1st sub report | find it from reports.json>": {
      "dataValues": [
        {
          "categoryOptionCombo": "<category option combination id | find it from DHIS instance>",
          "dataElement": "<data element id | find it from DHIS instance>",
          "row": <row number of the cell | find it from output of the SQL report>,
          "column": <column number of the cell | find it from output of the SQL report>
        },
        {
          "categoryOptionCombo": "<category option combination id | find it from DHIS instance>",
          "dataElement": "<data element id | find it from DHIS instance>",
          "row": <row number of the cell | find it from output of the SQL report>,
          "column": <column number of the cell | find it from output of the SQL report>
        },
        ............more data element mappings............
      ]
    },
    "<name of 2nd sub report | find it from reports.json>": {
	  "dataValues": [......]
    },
    "<name of 3rd sub report | find it from reports.json>": {
	  "dataValues": [......]
    },
    ............more sub report mappings............
  }
}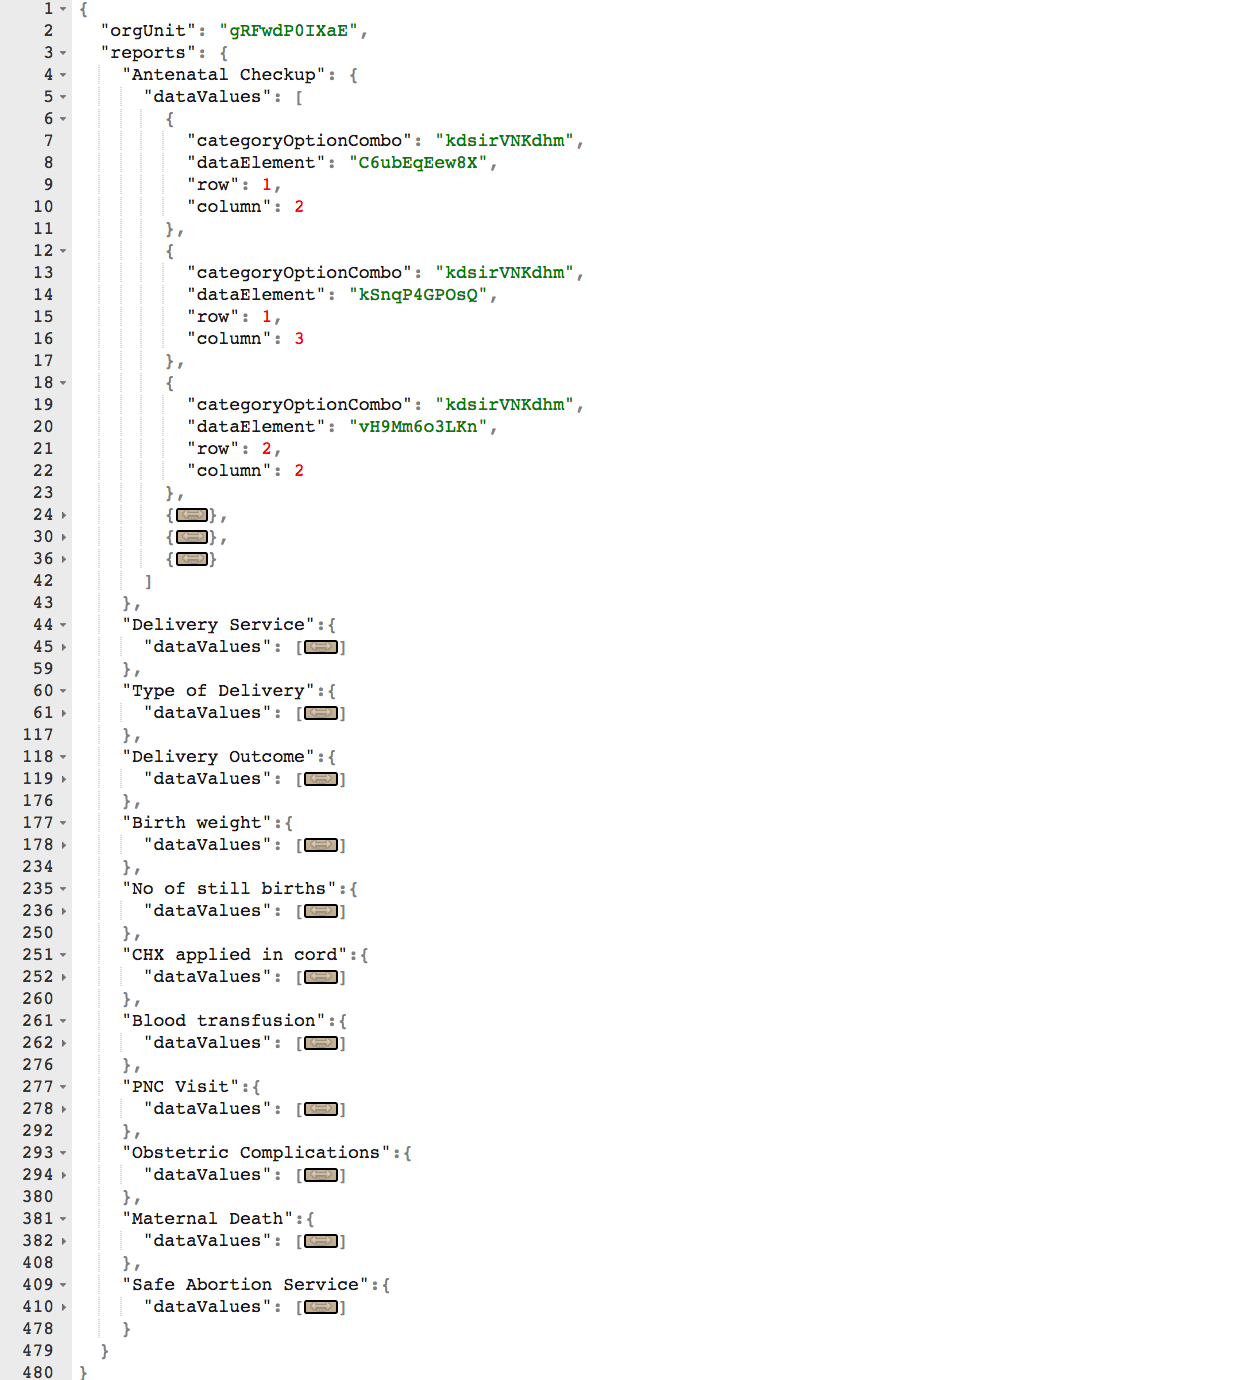
| Key | Description |
|---|---|
| orgUnit | This is the organisation unit ID from DHIS |
| reports | This is list of reports which are the inner reports of concatenated report of the program. Each report name is a unique key in this object.'Antenatal Checkup' is one of the inner reports configured in concatenated report, for example. |
| dataValues | This is list of data element mappings. Each mapping maps a cell in SQL output to a dataElement in DHIS. |
| categoryOptionCombo | This is the 'category option combination id' of the dataElement in DHIS. |
| dataElement | This is the 'data element id' of the dataElement in DHIS. |
| row and column | This 'row and column' numbers refers to a particular cell in the output of configured SQL. |
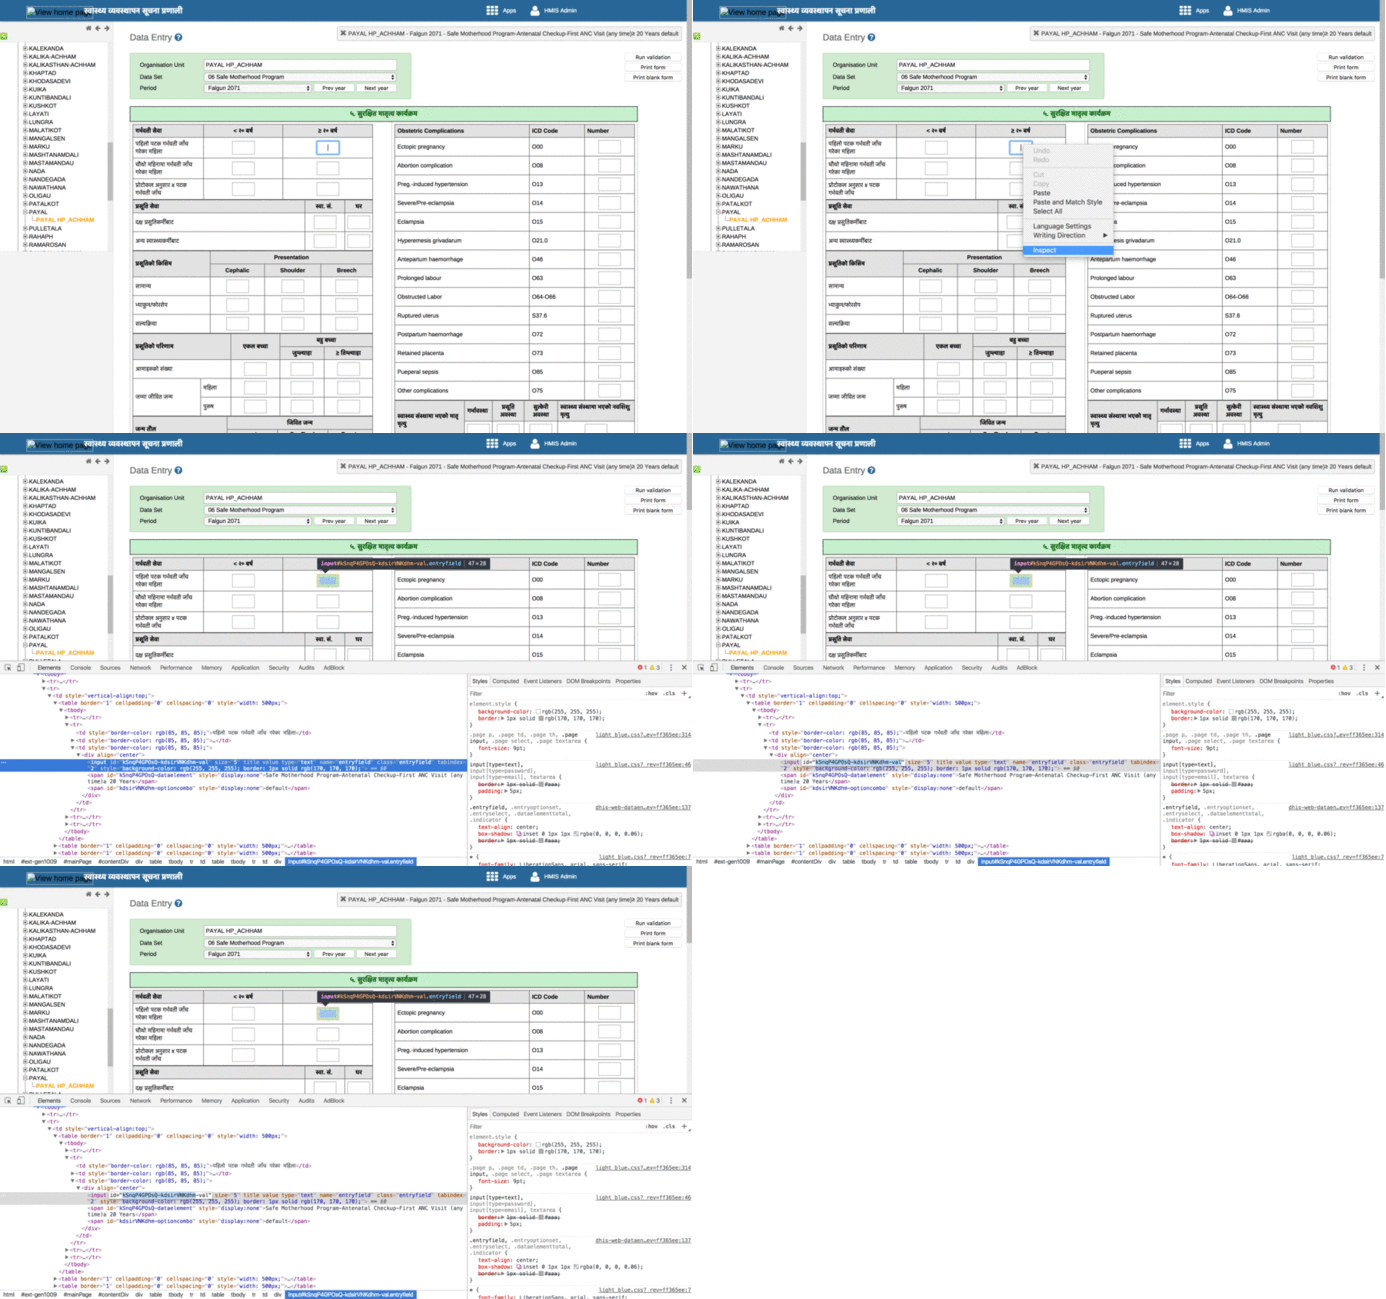
Notes: To find out the orgUnit Id, dataElement Id, category option combo Id do the following:
- Access the DHIS2 government server in your browser.
- Open data entry apps and select appropriate organisation and location.
- Once the data entry forms are visible, click on the input boxes where you enter the data.
- Right click on the input box and select "Inspect" from the options.
- Copy the Id of the html element from window (See image), it would look like the following string: "kSnqP4GPOsQ-kdsirVNKdhm-val".
- This string is in the format of "dataElementId - categoryOptionComboId - ...."
- These dataElementId and categoryOptionComboId need to be used in DHIS2 configuration file. Refer the below image.
원문 정보
원문 보기 ↗Bahmni Wiki · CC BY-SA 4.0