Creating OWA in Bahmni
Description
OWA’s (Open Web App) are simple web apps developed using web technologies like JS, HTML and CSS. OpenMRS REST API can be used for the server side calls. Please refer this OpenMRS wiki page before working on OWA.
Creating new OWA App
1. Clone OWA App scaffold
git clone git@github.com:sanishmaharjan/boilerplate-react-owa.gitAn front-end React OpenMRS admin OWA app boilerplate for development.
Features of this boilerplate-react-owa
- React OpenMRS Admin OWA App scaffold
- OpenMRS Admin OWA UI layout styling
- React components testing with Jest framework
- Support I18N
- Js code formatted with Prettier code formatter
Preview Scaffold OWA App
2. Folder structure
3. Provide web app informations
Open /app/manifest.webapp and edit
Mostly you have to edit values of version, name, description & developer.
4. Install the yarn dependencies
This OWA uses yarn as a package manager and for its build tasks.
5. Compile the code and build the artifacts
For development 'watching mode'
This command also triggers the watch mode for debugging. This means that any changes will trigger an update to the main app.js in order to hot-deploy changes while developing.
For production
This command minified bundles for production.
The output of build in
6. Deployment for runtime debugging
Check your OWA settings admin page at /openmrs/module/owa/settings.form on your runtime instance of OpenMRS.
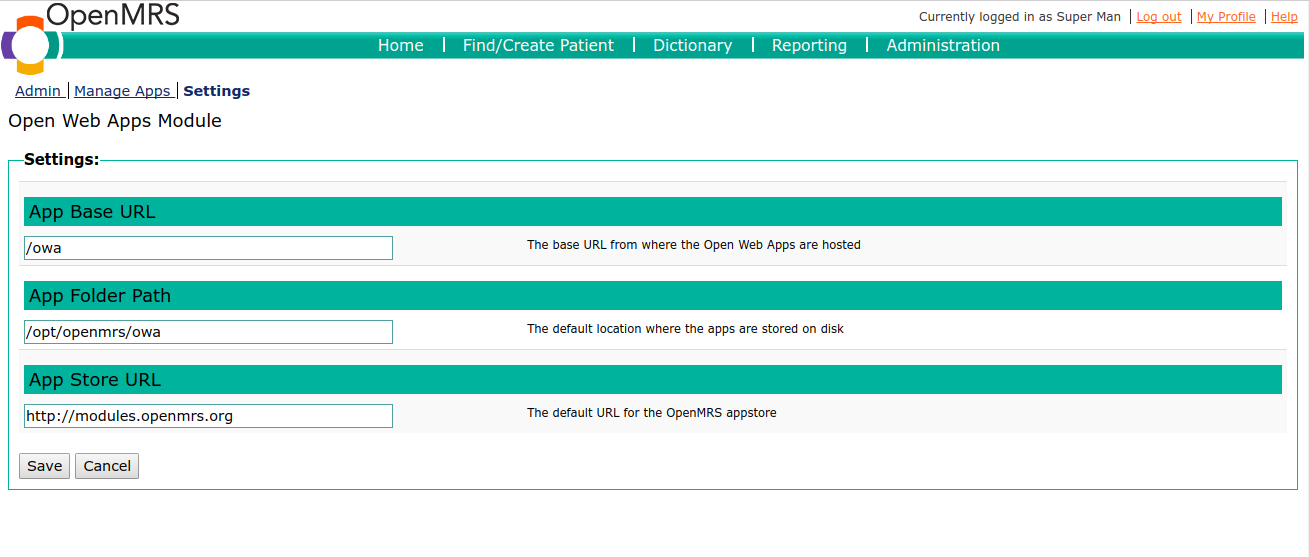
The key setting is the 'App Folder Path' that contents OWA Apps. Typically the location for all OWAs of your OpenMRS instance should be in /opt/openmrs/owa , the idea would be to symlink the content of the OWA to your code repo:
This is assuming that Tomcat is able to serve symlinked content. If that is not an option, then you will have to copy (instead of symlinking) the content of the app folder of your local repository to /opt/openmrs/owa/boilerplate each time you want to observe a change that you have made.
OR create a zip /app folder. Then Browse and Upload it from OpenMRS UI as mentioned in the below screenshot.
To upload it from OpenMRS UI, you need to set module.allow_web_admin value to true in /opt/openmrs/etc/openmrs-runtime.properties file. This value is set to false by default.

7. Running tests
This OWA uses Jest as a test framework and snapshot testing for UI & its behaviour testing.
$ yarn testIf you want to run specific test only
$ yarn test <regex>Where 'regex' can be used to point to certain targeted test files.
When it is clear that UI changes are as wanted, the Jest snapshots should be regenerated to be part of the next commit:
$ yarn test --u8. Running Code formatter
This use prettier code formatter. Before pushing any code, you should run code formatter.
$ yarn code:formatSetUp OWA in openmrs module And automatically deploy owa upon installing omod
1. Create /owa folder in openmrs module and copy all files into owa folder
Folder structure of openmrs module will be.
For reference check openmrs-module-bedmanagement.
2. Create /owa/pom.xml
3. Create /owa/assembly.xml
- Copy content form this assembly.xml
4. Update /pom.xml
5. Update /omod/pom.xml
6. Update config.xml
- Add require openmrs owa module as this
7. Add link to OWA App UI from the legacy admin UI
- Add legacyui dependancy as these /pom.xml and /omod/pom.xml
- Add link to admin page as config.xml
- Create AdminList.java. Please refer this
8. Build omod
Now this automatically packed owa into omod. And deploy owa app upon installing omod.
Bahmni Wiki · CC BY-SA 4.0